PROGRAMMING
1. Programming screen.
2. Name screen.
3. Programming of values.
4. Programming of lists.
5. Programming of formulae.
6. Formulation window.
7. Basic operators.
8. Groups.
9. Integrated functions.
10. Lines.
11. Browsing.
12. Templates.
PROGRAMMING
The startup screen is the starting point for setting the elements that will configure the program.
• To start, select a category and a type of element.
• By changing the category or type, the list is updated.
• If elements in a new category are to be created, the category must be created first and then selected.
• All new elements created are assigned to the category and type selected.
• The repository is handled according to the category and type of element selected.


By selecting one of the actions from the buttons on the toolbar, the program will go to the right place for it to be executed:
 NEW
NEW
This enables an new element of the type selected to be created and it is then added to the category highlighted.
 EDIT
EDIT
This modifies the way the element highlighted is programmed.
 DUPLICATE
This enables a new element to be created from an existing one by copying its content and editing it.
 REMOVE
This removes an element that has been highlighted from the library, once the program has checked that it is not being used by any other element.
 CALCULATE
This is used to go to the program execution mode.
This is used to go to the program execution mode.
In the case of a new element (of the category and type highlighted) and the modification or duplication (of the element selected), the program switches to the editing screen, which has three windows:
CONTENT
KEYBOARD
Each type of element configures these windows differently depending on the action to be performed.
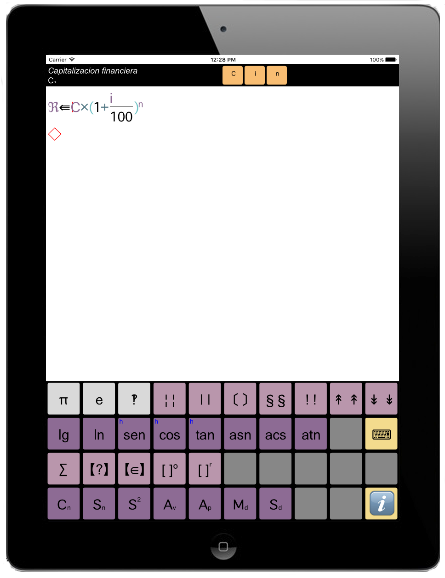
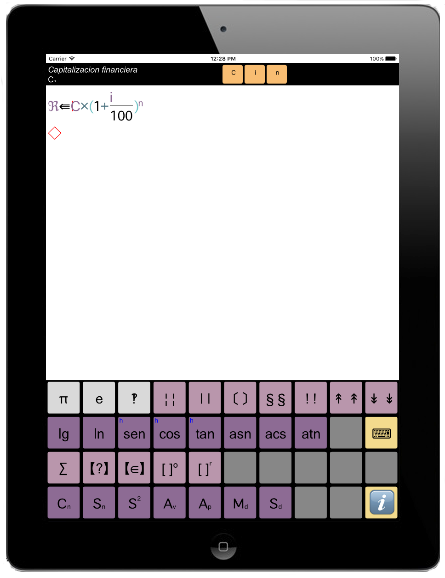
1. PROGRAMMING SCREEN
The second window on Eureka is the programming screen. Program elements can be created and calculations made from this screen.
It is divided into three:
THE NAME OR RESULTS SECTION
In order to edit an element (formula, value, list or template), this section serves to create the heading and symbolic name of an element in accordance with the type, the associated configuration values or (for formulae) the call parameters and the auxiliary calculation variables. The results of calculations are displayed here. It is generally divided into three parts.
CONTENT BOX
The program associated with the type of element being defined is entered here. (This section is disabled in Values).
KEYBOARD
The keyboard is at the bottom of the screen. Its configuration is automatically changed so that the symbols belonging to the programming phase in which an entry is found are always displayed.
The constant values or general pre-programmed mathematical functions that are integrated in the calculator are on the second page of the keyboard. They go by their generally accepted names, so no further explanations are required.
By pressing the key of a constant value or integrated function, a call to its symbol is added and, depending on the format, the parentheses open to show the calculation parameters or the cursor places itself to display the parameter as a subscript.
2. NAME SCREEN
The first box in the programming window is the ‘Name’ window. It contains the following information:
1. Label
2. Nombre.
3. Format.
4. Parameters.

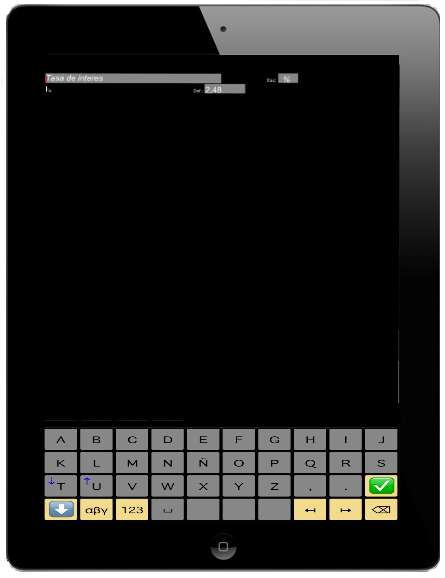
LABEL
This is a descriptive text associated with a given element to define its function. An alphanumeric keyboard is displayed for the headings that can be used to type in whatever text the user wishes to add.
NAME
The name of an element is entered at the bottom, as it will appear in the mathematical expressions in which it is used. A great variety of symbols traditionally used in mathematics are allowed for representing the names of formulae, values and tables. This enables users to assign a direct, intuitive and simple image to each element of calculation.
As is the standard practice in mathematical elements, they should be short and simple. Each element can have a name of up to 8 characters. The first is the main one and can have ‘embellishments’. The remainder can be set on the same line of type, or as subscripts or superscripts, or both.
As is the standard practice in mathematical expressions and scientific notation, it is recommended that the name be based on a letter, which can be Latin or Greek, uppercase or lowercase, or an additional set of auxiliary characters (ornamental, Hebrew, symbols, etc.).
An element must comprise one (or two if necessary) main letters, an embellishment added in the case that an element is to be created that is related to the same symbol, and one or two letters or numbers in subscript or superscript in order to create names that are clear, short and easy to handle.
The first letter of a name can take an embellishment. An embellishment is a punctuation mark superimposed on the main letter in order to distinguish its function from other similar ones, and this creates a set of related symbols. The same effect can be obtained by using subscript and superscript.
A special type of embellishment that is not visible makes it possible to embed the second letter in the first, at three different levels, in order to create the effect that they are superimposed, i.e.
[ º ^ ̄ ̄̄ ̃~ ” ];.
Whilst the name window is open and its content is being defined, the alphabetical keyboard is enabled. In order to enable this window from the content window, touch it on the left-hand side.
It recovers focus, changes the background colour, configures the keyboard and displays the cursor in the place it should be. To go from the name to the content (formulation) window, just touch the latter anywhere.
3. PROGRAMMING OF VALUES
A ‘Value’ is understood to be a programming element that assigns a name to a piece of simple numerical content. The values are names assigned to numbers.

A value can be fully defined in the name window without the need to use the content window.
As described previously, a descriptive label is written in the name window based on the value, as is the name, which will be used to designate it in the formulae in which it is used.
The following additional information is added: DEF.
The default value, or the numerical value assigned to the variable for use in the formulation.
SCALE
This shows the value's unit of measure, which may be:
• 1. The nominal value that is entered.
• %. The value is expressed in percentage terms.
• ‰. The value is expressed as parts per mille.
•  . The value is expressed as parts per million.
4. PROGRAMMING OF LISTS
A ‘List’ is understood to be a number of numerical values that can be accessed in the formulation from an access index.

There are two steps to defining a list: its name and attributes are set in the Name window and then the values are entered in each of the values that make up the list.
As described previously, a descriptive label is written in the name window based on the list, as is the name, which will be used to designate it in the formulae in which it is used.
The following additional information is added:
FORMAT
The format for displaying an element is set according to its type on the left-hand side of the line. The format enables users to decide how the search index of the numerical element in the list is displayed when it is used in a mathematical expression (formula). The formats allowed for lists are:
• [x] Square brackets:The parameters are written without a name (in order of appearance) between square brackets, e.g.: Ψ₅[n].
• Sub Subscript: The parameters are seen as unnamed subscripts, e.g.: Ψn
SCALE
This shows the units of measure of the values in a list, which may be:
• 1. The nominal value that is entered.
• %. The value is expressed in percentage terms.
• ‰. The value is expressed as parts per mille.
• . The value is expressed as parts per million.
DEF.
The default value, or the numerical value that the list will return when a given element searched for does not exist.
MAX
This is the number of elements that make up a list and that are created when the value window is opened. If this value is modified, the size of the list changes immediately by inserting the elements (gaps) that are missing or by deleting those that are left over.
INDEX
This controls the behaviour of a list at the time a search for an element is made. It can be:
• A sequence: The index is a consecutive number from zero upwards.
• From: The index forms part of a set of values starting from one given value (inclusive) to another (exclusive).
• Up to: The index forms part of a set of values starting from the previous value (exclusive) going up to a given value (inclusive).
• Key: A search is made for an element whose search index exactly coincides with the key shown in each element
Each of the elements that make up a list are entered into the work window. Each list comprises two columns: index and value.
Depending on the type of access index (sequence, from, up to or key), the index runs automatically (sequence) or must be entered together with a value. The up and down arrow keys are used to move from one element to another. The left and right arrow keys place the writing pointer on an element.
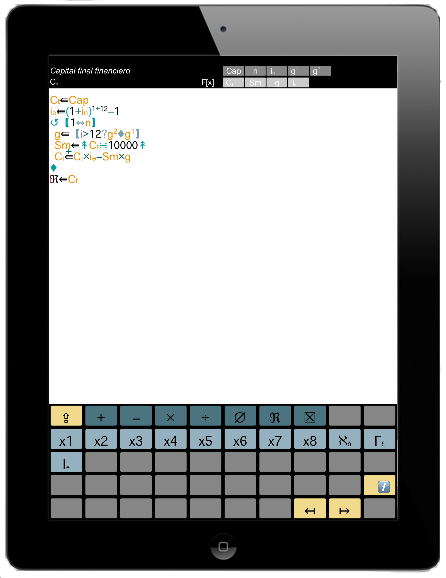
5. PROGRAMMING OF FORMULAE
Eureka's main task is to programme formulae, which will be stored in your personal library for direct use in calculations on a recursive basis.

The first step in setting up a formula is to create a heading to identify it in the ‘Name’ window. In addition to the label and name, which follow the standard rules of nomenclature, the following must be defined for each formula:
FORMAT
The format for displaying an element is set according to its type on the left-hand side of the line. The format enables users to decide how the parameters of a function call are displayed when used in a mathematical expression (formula).
If a formula has more than one parameter, they are separated by the operator ‘Separate’ ‘ ’. The formats allowed for formulae are:
• () Parentheses: The parameters are written without a name (in order of appearance) between parentheses,
e.g.: Ψ₅(1 2).
• [] Square brackets: The parameters are written without a name (in order of appearance) between square brackets,
e.g.: Ψ₅[1 2].
• [n⇦x] Named: The parameters are written between square brackets, and each one displays its assigned name and operator,
e.g.: Ψ₅[α ⇦ 1 β ⇦ 2].
e.g.: Ψ 1
2
PARAMETERS
The formulae enable call parameters to be defined that will later be replaced by real values in the expression in which they are used by running the parameter parse call, as is standard in scientific calculation and in programming languages.
• Up to a maximum of 8 parameters can be set for each formula.
• Each parameter has a name, which is made up of one to three letters (uppercase, lowercase, Latin or Greek) that can be written as subscript.
• It is recommended that the parameters be given names that are concise, clear and straightforward.
• These names are used in the mathematical expressions that make up the formulae that are defined, and during runtime their value is substituted by the call value.
• When a formula in an expression is called, these names can be seen in the expression if so specified in the format of the call (second form).
• In forms one and two, only the position but not the name is taken into account.
LOCAL VALUES
The multiline formulae enable local values to be set that are used as auxiliary variables in a formula in order to store interim results, as occurs in programming languages. On exiting a formula, these values are lost.
• Up to a maximum of 8 parameters can be set for each formula.
• Each local value has a name, which is made up of one to three letters (uppercase, lowercase, Latin or Greek) that can be written as subscript.
• It is recommended that the local values be given names that are concise, clear and straightforward.
• These names are used in the mathematical expressions that make up the formulae that are defined.
6. FORMULATION WINDOW.
In the content edit section of a formula (programming window), the set of self-configiring keybpards are used to enter the mathematical expression that makes up the formula.
A formula can be a simple mathematical expression (a single line) of a complex one (multiline).
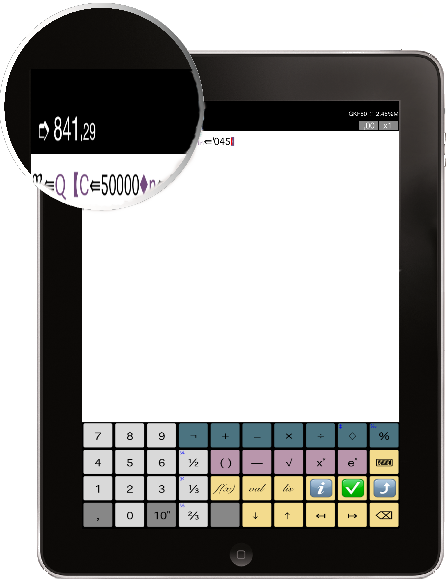
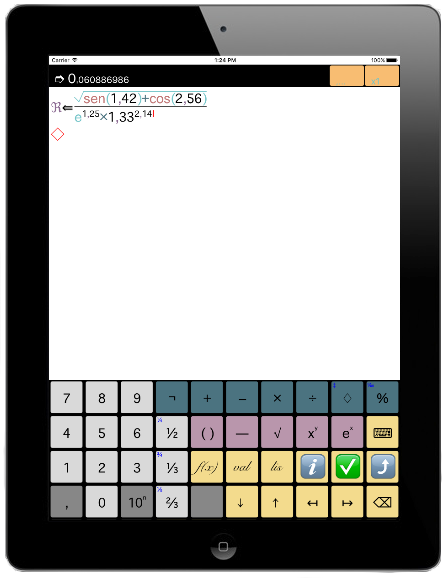
The variable ℛ receives the result. The result returned by a formula when it is called in an expression by another formula or calculation is the final content of this variable, regardless of whether partial results can be assigned to other value variables in the library.
When a formula is edited, only the left and right arrow keys may be used to move around the text of a formula in order to add or modify an expression.
• The left arrow key is used move backwards in the code and the right arrow to move forwards until the writing pointer is in the right place.
• The writing pointer is shown as a red vertical line between two programming symbols.
• Any new symbols will be inserted exactly between the two symbols where the writing pointer is found (or at the beginning or end of an expression), and all other expressions will be moved accordingly.
• As expressions are not represented linearly due to the existence of mathematical variables (numerators, denominators, powers, summations), care must be taken whenever a formula is edited and its basic internal structure fully understood.
A formula is an algebraic expression used for calculation that is represented internally as a sequence of symbols arranged as they appear on screen and that is also the order in which they are calculated.
This is why it is only possible to go backwards or forwards in the order expressions are arranged, which must be borne in mind at all times. Furthermore, an element can cause confusion until the existence of logical groupings (GROUPS) is assimilated.
As discussed previously, a group is a part of an expression that is evaluated on its own.
• The basic model uses parentheses. An expression between parentheses has its own identity and is evaluated first.
• All groupings act as parentheses but have calculation directives that give them their own identity.
The groupings in Eureka, as well as formulae added and defined by users, will be discussed below.
Eureka always writes the opening and closing parentheses in a single operation in order to make it easy to write expressions and ensure their coherence, and it avoiding any errors made in the balancing of parentheses.
This has two consequences:
• Firstly, that whenever a GROUP key is pressed, the program's open and close symbols will always be inserted. In some cases they will be seen and in others they will not. The writing pointer must always be placed between them in order to write the content.
• The way to exit a GROUP once an expression has been completed is to move the writing pointer using the right arrow key so that it is in front of the close symbol.
If a GROUP is not explicitly visible (i.e. the open and close symbols are implicit), it must be handled in the same way. However, as the open and close symbols cannot be seen it is more difficult and, therefore, it is advisable to have a firm grasp of when the cursor is inside or outside of the GROUP.
Are invisible
• Fractions, powers, exponentiation, square roots, summation indices and table.
Are visibles:
• Parentheses, absolute values, integers, decimal numbers, factorials, floors and ceilings are visible.
It is possible in all cases to know where the cursor is from its position, size, colour or effects. It is important to get used to this idea.
If a symbol is written inside a GROUP, it is simply deleted and the right arrow key used to exit it.
It is also important to be aware of how to delete GROUPS.
As discussed above, the open and close symbols are inserted simultaneously and must never appear unpaired or out of order. This means that if a GROUP is deleted, both the open and close symbols will be removed at the same time.
To avoid accidentally deleting whole expressions, Eureka requires that a GROUP must be empty, that is, there must not be any expression inside it, before it can be deleted.
A GROUP cannot be deleted iof there is anything written inside it. The rules are:
• Never directly delete a close symbol. If an attempt is made to do so, the command will simply not be executed. If the delete key is pressed behind a GROUP close symbol, nothing will happen. In the case of invisible GROUPS, it should be taken into account that the cursor does not go backwards.
• Secondly, before a GROUP can be deleted the expression inside it must be removed. Once it is empty, it can be deleted by pressing the delete key at the beginning of the GROUP (open). For GROUPS with separators (maximum, minimum, functions with more than one parameter) only the separators should be left inside them.

7. BASIC OPERATORS
Basic operators are a set of elemental symbols that carry out basic arithmetic operations.

 CHANGE OF SIGN
This changes the sign of the following value or expression.
 ADD
ADD
This adds up the previous and following values or expressions.
 SUBTRACT
This subtracts the difference between the previous and following values or expressions..
 MULTIPLY
This multiplies the previous and following values or expressions.
 DIVIDE
This divides the previous value or expression by the following one. This is an alternative to the fraction operator (GROUP).
 MODULUS
This calculates the modulus, or the rest of a long division, between the previous and following values or expressions.
INTEGER QUOTIENT
This divides values into each other and gives an integer quotient as a result.
 PERCENT
This operator enables percentages to be calculated, depending on the previous operator.
• If the previous operator is ‘+’, the first value will be increased by %.
• if it is `-`, it will take away %.
• If it is `×`, the % value is calculated
• if it is ‘÷’ the result obtained is the % value of the first value over the second.
50 + 4 % = 52
50 – 4 % = 48
50 × 4 % = 2
45 ÷ 150 = 30 %
PER MILLE
This works in a similar way to % but in parts per thousand.
8. GROUPS
Groups, or grouping operators, are made up of two symmetrical symbols (open and close) that enclose or group together an expression on which the action associated with a group's operator is executed.

Groups, or grouping operators, are made up of two symmetrical symbols (open and close) that enclose or group together an expression on which the action associated with a group's operator is executed. Some open and close symbols can be seen, but are displayed by a change in size and position (subscripts and superscripts) in line with standard mathematical notation.
 PARENTHESIS
This serves to determine the order of precedence of calculations, in the standard way used in mathematical calculation.
 FRACTION
A fraction bar opens that enables a numerator and a denominator to be entered. In order to go from the numerator to the denominator the cursor must be moved using the right arrow key, which is also used to exit a fraction.
 SQUARE ROOT
This opens a group in which the value on which the square root is calculated can be stated. Its length is worked out from the size of the top line. To exit this function, the cursor must be moved using the right arrow key.
 POWER
POWER
This opens a group in which the value of an exponent can be stated. To exit the exponent, the cursor must be moved using the right arrow key.
 EXPONENTIATION
This opens a group in which the value of the exponent can be raised to the power ‘℮’ (base of Napierian logarithms). To exit the exponent, the cursor must be moved using the right arrow key.
 ABSOLUTE VALUE
This removes the sign of the expression entered.
 INTEGER
This extracts the integral part from the result of an expression and disregards decimal part.
 DECIMAL NUMBERS
This extracts decimal part from the result of an expression and disregards the integral part.
 FACTORIAL
This calculates the factorial of an expression or its included value.
 MAXIMUM
This returns the highest value on a list of values or expressions.
 MINIMUM
This returns the lowest value on a list of values or expressions.
 DECISION TABLE WITH CONDITIONS
Three values or expressions are entered here. The first, in front of the ‘?’ sign, handles an operation. If the result is true, it returns the second expression as a value and the third if it is false. The separator symbol ‘ ’ is used to separate the second and third expressions.
[5 > 3 ? 18 35] ➭ 18
 INDEXED DECISION TABLE
An initial expression must be entered, which will be the search key. A list of expressions is then entered that is made up of two parts: key and value.
If the search key is in the key of the element, it is returned as the result of the value. Finally, a default value can be set that will be returned if the key has not been found in any element.
This complex operation uses the following symbols:
• ► Separates the search key from the rest.
• Separates the various search elements. Each element comprises a key and results field.
• ⇉ Separates the key of each search element from the result. What appears on the right is the value that is returned if the search key is in the element's key field.
• ¨ Separates the various simple values in the key field from the element.
• ↔ Creates key value intervals. The interval ranges from the value in front of the symbol to that behind it.
• ➲ Default value. This is the value that is returned if the search is unsuccessful.
For example:
[index ► 5 8 12 ↔ 22 ⇉ 2’34 30 31 ⇉ 7’12 ➲ 8’56]
, which means that if the value of the 'index' is 5 or 8, or is in the range of 12 to 22, the result is 2’34. If the value of the 'index' is 30 or 31, the result is 7’12. In all other cases, the result will be 8’56.
9. INTEGRATED FUNCTIONS
The constant values or general pre-programmed mathematical functions that are integrated in the calculator are on the second page of the keyboard.
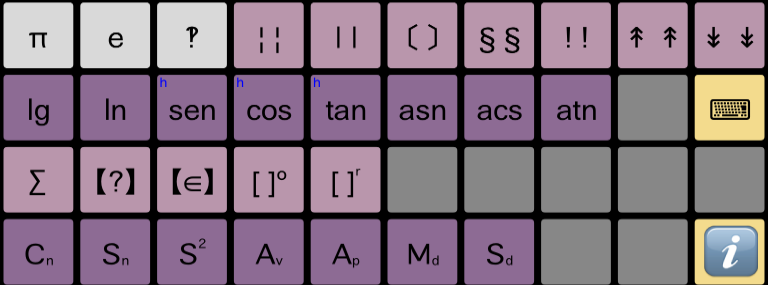
They go by their generally accepted names, so no further explanations are required.
By pressing the key of a constant value or integrated function, a call to its symbol is added and, depending on the format, the parentheses open to show the calculation parameters or the cursor places itself in the right place to display the parameter as a subscript.

10. LINES
Although most calculations can be expressed in a single expression, which evaluates a formula and assigns it to the result, one of Eureka's essential programming features is that a calculation procedure (formula) can contain various lines, which together evaluate the final result.
Each line is identified by the operator that controls it, which can either be an assignment operator (evaluates an arithmetical expression and assigns its result) or a decision operator. Depending on the control expression, Eureka decides which path to take.
SIMPLE ASSIGNMENT
This assigns the result of an expression to the assignment variable. By creating an assignment (⇦), the variable 'Result' (ℜ) is set as the receiver variable by default.
It contains the final result that a formula will return or the result of the calculation being made. By placing the cursor at the beginning of an expression, the 'assignment keyboard' displays the possible modifications that can be made. This keyboard can be used to change a calculation's receiver variable by setting any global variable stated in the general 'Values' tab, or any local variable or parameter stated in the header of a formula ('Name' window).
The 'Calculate' function automatically defines 8 predetermined local variables, which are marked as up to . It is also possible to add calculation modifiers, which affect the assignment.
As they are arithmetic operators (+, -, ×, ÷), the assignment variable is used to operate (by adding, subtracting, multiplying or dividing), rather than the result being directly assigned to the assignment variable.
TABLE ASSIGNMENT
This generally works in the same way as a simple assignment, but the result is assigned to (or used to operate) each of the elements in the assignment table to create a calculation loop, in which the calculation of an expression is repeated for each of the elements in the table, thus giving a list of results instead of a single result.
In order to control a loop, a local variable 't' is automatically created that appears in the basic keyboard and can be used in calculations.
DECISION
This is the ability to create a program block (of one or several lines) according to the result of the 'logical' expression that serves as the control.
A logical expression may either be true or false. Whenever a logical expression is being written, comparison and Boolean operators appear in the corner of the keyboard. (<, >, =, ≤, ≥, ≠,∈).
The decision block is made up of a 'true' set (✓), which is evaluated whenever the control expression gives a true result, and a 'false' set (✖), which is evaluated whenever the control expression gives a false result.
SELECTION
This is the ability to create a different program block (of one or several lines) depending on the result of the control expression.
Once an expression has been evaluated, its result is compared with each of the selection values and the code of the block belonging to the coincident selection is executed.
Otherwise, there is a default selector that evaluates a block of code should no coincidence be found.
REPETITION
This consists in evaluating the block of instructions (of one or several lines) repeatedly, depending on the end-of-test-criterion.
There are three options:
• 1. Repetition of a condition: The block is repeated provided the result of the logical control expression is fulfilled (it gives true as a result). A logical expression may either be true or false.
Whenever a logical expression is being written, comparison and Boolean operators appear in the corner of the keyboard (<, >, =, ≤, ≥, ≠,∈).
• 2. Indexed repetition: A block is repeated as many times as there are elements in the control interval, which consists of a series of intervals (initial and final values) or set values. The local variable takes the value of the index every time it is executed.
• 3. Repetition of a list: A block is repeated once with each of the values in a list. As the list in an expression is used, it is not necessary to establish an index as it is assumed that it is the element currently being evaluated.
11. BROWSING
When a formula is edited, only the left and right arrow keys may be used to move around the text of a formula in order to add or modify an expression.
. The left arrow key is used to move backwards in the code and the right arrow to move forwards until the cursor is in the right place. The cursor is shown as a red vertical line between two programming symbols.
Any new symbols will be inserted exactly between the two symbols where the cursor is found (or at the beginning or end of an expression), and all other expressions will be moved accordingly.
As expressions are not represented linearly due to the existence of mathematical variables (numerators, denominators, powers, summations), care must be taken whenever a formula is edited and its basic internal structure fully understood.
A formula is an algebraic expression for making linear calculations, which are arranged in the order their components appear on screen and are calculated accordingly. This is why it is only possible to go backwards or forwards in the order expressions are arranged, which must be borne in mind at all times.
Furthermore, an element can cause confusion until the existence of logical groupings (GROUPS) is assimilated.
As discussed previously, a group is a part of an expression that is evaluated on its own. The basic model uses parentheses. An expression between parentheses has its own identity and is evaluated first. All groupings act as parentheses but have calculation matrices that give them their own identity. The groupings in Eureka, as well as formulae added and defined by users, have already been discussed above.
Eureka always writes the opening and closing parentheses in a single operation in order to make it easy to write expressions and ensure their coherence, and it corrects any errors made in the balancing of parentheses.
This has two consequences:
• Firstly, that whenever a GROUP key is pressed the program's open and close symbols will always be inserted. In some cases they will be seen and in others they will not. The cursor must always be placed between them in order to write the content.
• The way to exit a GROUP once an expression has been completed is to move the cursor using the right arrow key so that it is in front of the close symbol.
If a GROUP is not explicitly visible (i.e. the open and close symbols are implicit), it must be handled in the same way. However, as the open and close symbols cannot be seen it is more difficult and, therefore, it is advisable to have a firm grasp of when the cursor is inside or outside of the GROUP.
Fractions, powers, exponents, square roots, summation indices and table subscripts are invisible.
. It is possible in all cases to know where the cursor is from its position, size, colour or effects. It is important to get used to this idea. If a symbol is written inside a GROUP, it is simply deleted and the right arrow key used to exit it.
It is also important to be aware of how to delete GROUPS. As discussed above, the open and close symbols are inserted simultaneously and must never appear unpaired or out of order. This means that if a GROUP is deleted, both the open and close symbols will be removed at the same time.
To avoid accidentally deleting whole expressions, Eureka requires that a GROUP must be empty, that is, there must not be any expression inside it, before it can be deleted. A GROUP cannot be deleted if there is anything written inside it.
The rule is to never directly delete a close symbol:
• If an attempt is made to do so, the command will simply not be executed. If the delete key is pressed behind a GROUP close symbol, nothing will happen. In the case of invisible GROUPS, it should be taken into account that the cursor does not go backwards.
• Secondly, before a GROUP can be deleted the expression inside it must be removed. Once it is empty, it can be deleted by pressing the delete key at the beginning of the GROUP (open). For GROUPS with separators (maximum, minimum, functions with more than one parameter) only the separators should be left inside them.
12. TEMPLATES
A template is a user-friendly form on screen that enables users to interactively input and output data and see them clearly displayed.

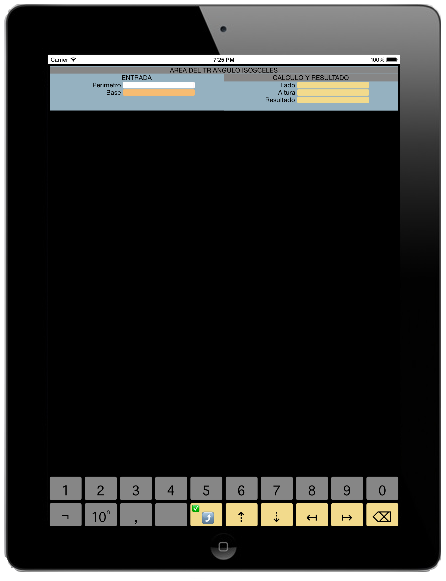
What makes Eureka a veritable mathematical programming language is the addition of the template module. A template is a user-friendly form on screen that enables users to interactively input and output data and see them clearly displayed.
A work method has been devised that sidesteps the complications inherent to handling input and output fields, whereby their position, size and aesthetic features are defined. To make the work of users easier, a simple environment has been created that automates most tasks by applying pre-set criteria, as well as displaying information so that it is easy to see on screen.
There are two steps to creating an interactive template. The first is to design the template form, which consists in defining all of the input and output fields that make it up. The second consists in applying the formulation and calculation to each of the output fields defined using the values of the input fields. The fields are automatically arranged on screen through a mechanism that places them in containers, which set their position.
A field consists of a label that describes it and the field name (which follows the same rules for naming all the other programming elements). An alternative option is to add a queue, which is a text that is displayed behind the field (to show units or additional information).
The fields are divided into panels. A panel is a space on the screen where the input and output fields are linearly arranged in succession. Its sole purpose is to arrange fields and decide where they should be placed on screen. There are horizontal and vertical panels. This is their main property. On a vertical panel, the fields that make it up are displayed vertically on top of each other. The field label appears first (on the left) and the field is displayed below it to form a column. On a horizontal panel, the fields are displayed in a single line one after the other. The field label appears just above the field in the shape of a header. Fields cannot be created outside a panel.
The panels are likewise placed in frames. A frame is simply a container of panels. A frame can contain as many panels as are necessary, within the constraints of the size of the screen. A frame can be horizontal or vertical. A horizontal frame places its panels next to each other, all of which are assigned the same space (width and height). A vertical frame places its panels on top of each other.
The system therefore has a hierarchical structure with all of the levels necessary to obtain the format required. The first element will always be a frame (horizontal or vertical). As many other frames or field panels as required can be added.
The templates are designed in such a way that their various components (frames, panels and fields) are each defined on a separate programming line.
The programming window is divided into two parts: the type and features of an element that is being defined are entered in the left-hand column, and the label, name and optional queue, in the case of fields, are entered on the right-hand side in free format. In each case, the virtual input key adjusts to the needs of what is being defined.
If the cursor is placed on the left-hand column, the element is shown in a red box and the type of element keyboard appears. The type of element to be defined (MarcoHor, MarcoVer, Panel Hor, Panel Ver, Campo) and its features can be set. Any elements that do not fulfil the set rules of hierarchy cannot be defined.
The second part of the process in creating a template is to assign calculations to the output fields. Using the 'switch' key (...), the status is switched. The formula programming window is displayed using its keyboard. The only difference with the procedure that is normally used to programme formulae is that when a keyboard with simple values is called, in the case of both calculation and assignment the fields defined are also displayed, as a result of which both the input fields can be used as a calculation value and the output fields as a simple assignment field.
Once a template has been created, it is saved like all other programming elements and forms part of the repository. To use it, select the initial access screen and click on the 'calculation' button.